Embedding Multiple Tests in One App
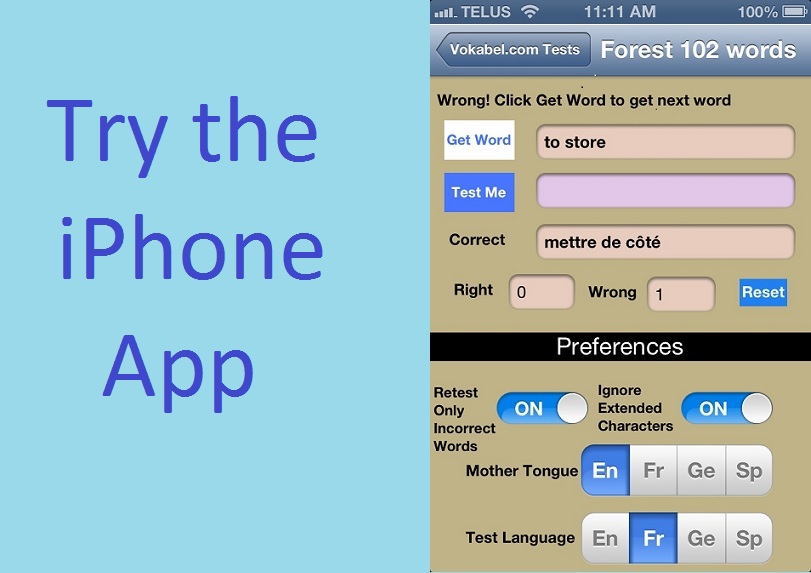
In the first part we created an app that allowed us to test ourselves with question/answer pairs
stored in a property list. This works great if we prefer to create a separate app for each of our tests
which results in a separate icon for each on our desktops. But to save space we may want to
embed multiple tests within a single app. This is what we will try to implement in this section.
View Controllers
In our initial test app the concept of a view controller was relatively meaningless to us. We created
what was called a Single View application and everything seemed to take care of itself with regards
to screen management (we actually only used one view controller).
We could focus on implementing the functionality of our app and all that we knew
about view controllers was that viewcontroller was part of the name of the .h and .m files that we added our
code to. But what happens
when we want to, out of necessity, use multiple screens? This requires us to implement a separate view
controller for each of our screens. We will also need the ability to navigate between our screens - something
we didn't need to worry about before.
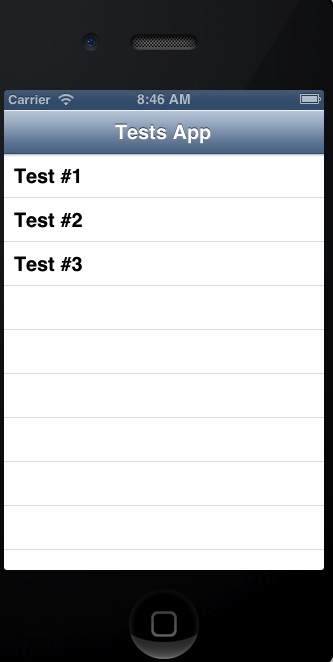
In this section the test itself will no longer be our main screen. We will add something called a table view to be our main screen.
You may already be familiar with table views if you are a regular iphone user because they are used to display a list of items that
we can select in apps such as contacts or music.
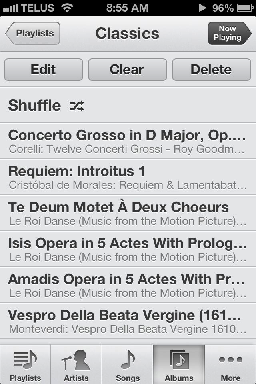
By implementing a table view, we will be able to select one of multiple tests all stored within the same app.
We will also be implementing a navigation controller which will allow us to navigate from the test
that we have selected back to the table view that lists all of the tests.
We'll try doing this while minimizing the work that we have to do by reusing the test logic and screen that
we created in the first section as well as the data of the one test.
The Details
Create your New App and Implement the Initial Table View Controller
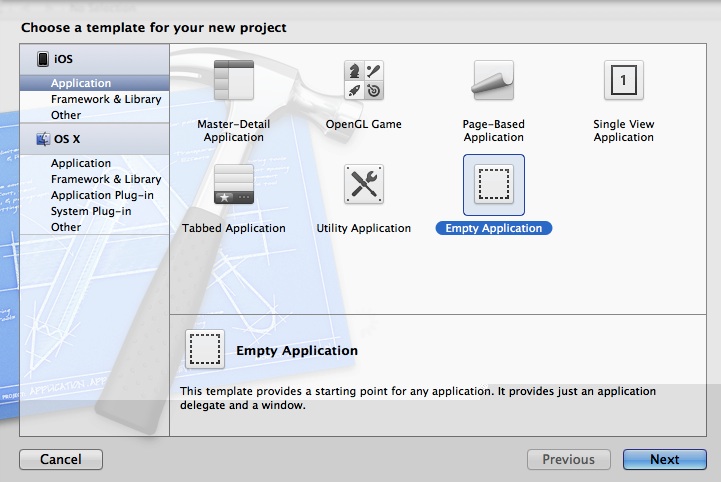
- Bring up xcode and select File->New->Project. Select an iOS application
and specify that you would like an Empty Application.
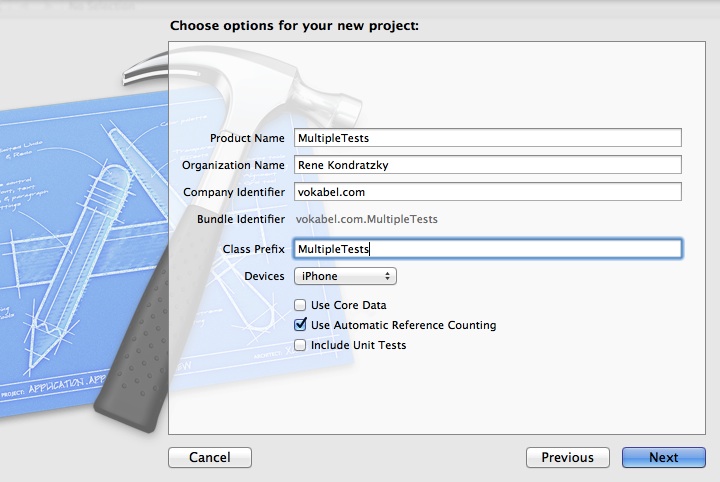
- Specify the product name as MultipleTests and the class prefix as MultipleTests
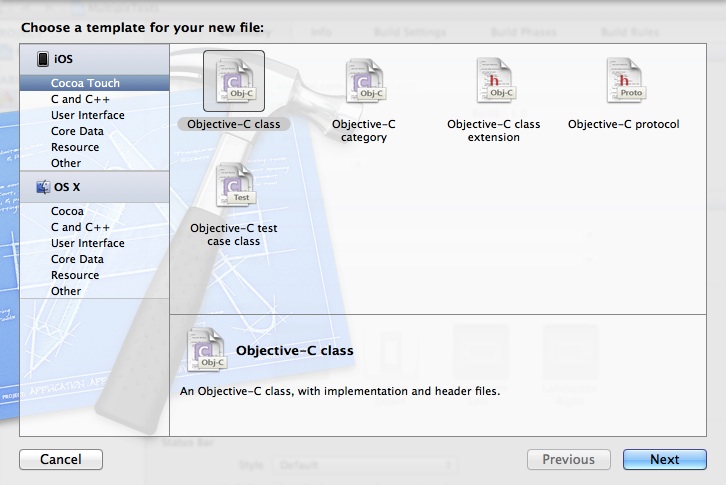
- Next we will create the root view controller. Right-click on the MultipleTests folder in the top left corner, select
New File, select iOS Cocoa Touch, Objective C class. click Next, select Subclass of UITableViewController, ensure
that "with XIB for user interface" is checked, and name the class RootViewController

Implement your Navigation Controller
- Declare your Navigation Controller in the MultipleTestsAppDelegate.h file
- Modify the MultipleTestsAppDelegate.m file to import the RootViewController.h file, synthesize what was
added to the MultipleTestsAppDelegate.h file, and modify the didFinishLaunchingWithOptions method with the
standard code for Navigation Controller implementation:
Initialize the Table View Controller
- Declare the array that will show the List of tests in RootViewController.h
- Next initialize the test list in the Table View in the RootViewController.m file and release the list when no longer required
- We are able to section off how the tests will be displayed in the table view which is something we should keep in mind when we
have more tests. For our current needs though will put all of our tests in one section by replacing numberOfSectionsInTableView and
numberOfRowsInSection with the following in RootViewController.m.
- Modify the cellForRowAtIndexPath method in RootViewController.m so it knows to pull data from our testList array
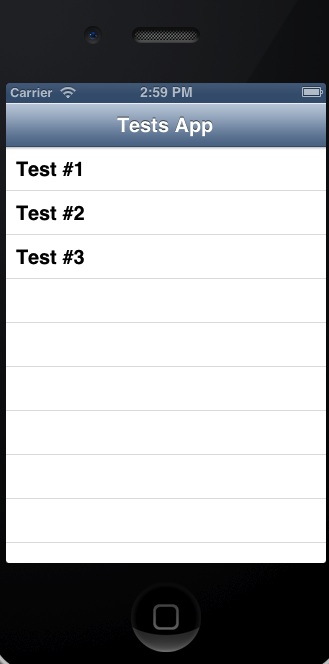
- At this point you should run your application to make sure that your test list is displayed
Integrate your Test from section 1 as the Next Screen
- Create a View Controller to handle the test screen. We can save ourselves time by setting the name to be the same as that
assigned for the original tests, i.e. test1. Right-click on the MultipleTests folder in the top left corner, select
New File, select iOS Cocoa Touch, Objective C class. click Next, select Subclass of UIViewController, ensure
that "with XIB for user interface" is checked, and name the class test1ViewController.
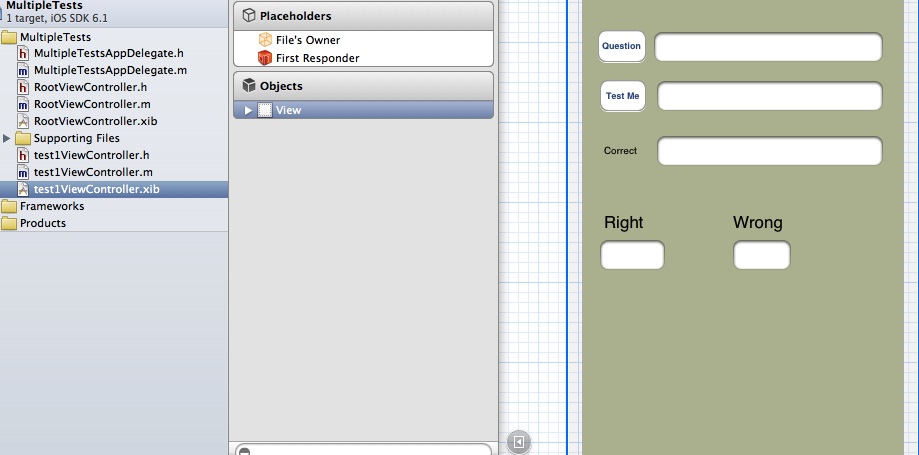
- At this stage, close xcode and replace the test1ViewController.h, test1ViewController.m, and test1ViewController.xib files
at the OS level with the equivalents that you created in section 1. Restart xcode and open the MultipleTests project.
- Click on the test1ViewController.xib file that you just replaced and you should see the familiar screen that you created in part 1
- Modify the RootViewController.h file so that it is aware of the new test1ViewController.
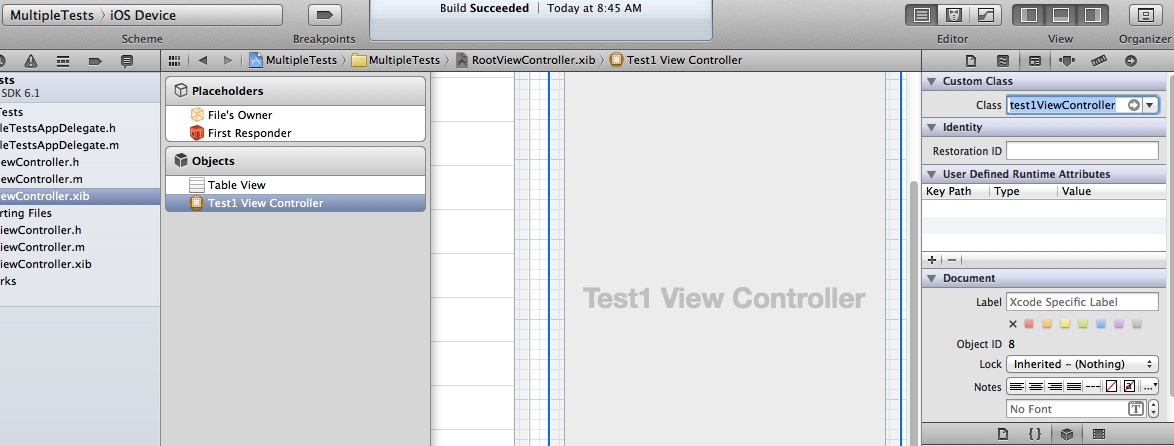
- Select the RootViewController.xib file and drag a ViewController object to the *Objects* panel
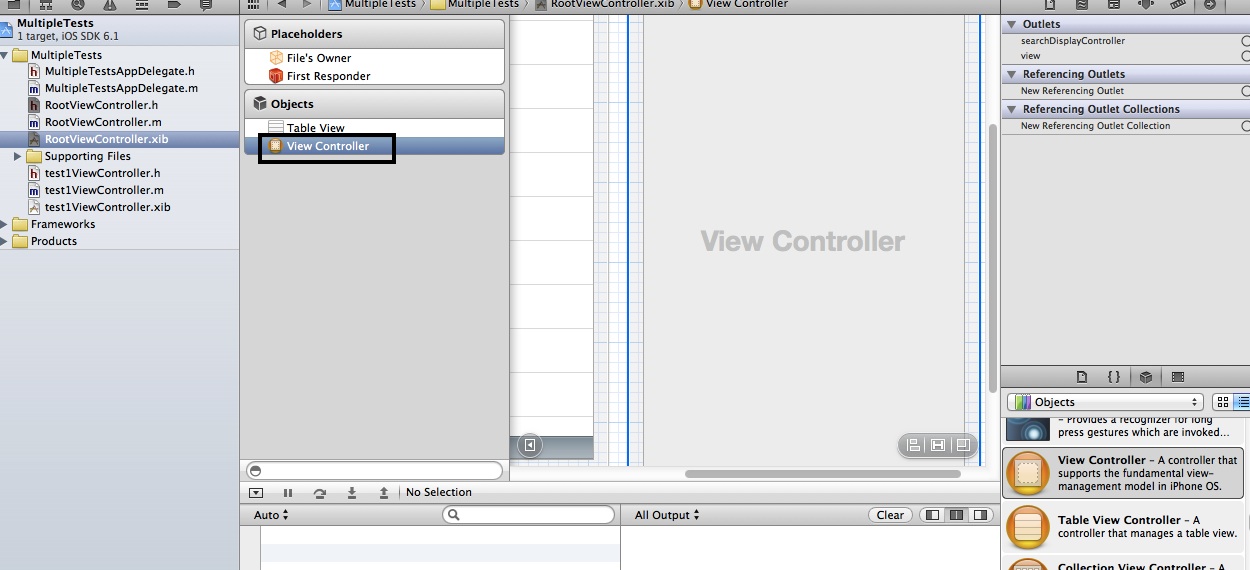
- Open the Identity Inspector and and change the Class from UIViewController to test1ViewController
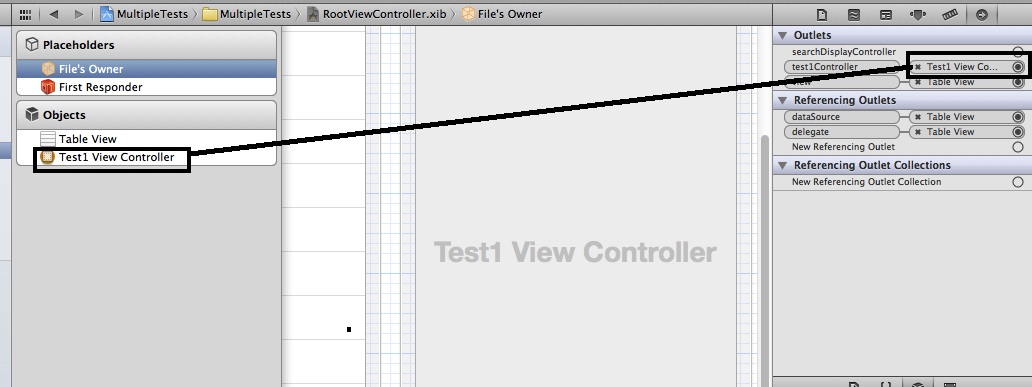
- Select the Files Owner entry under Placeholders. Open the Connections Inspector. Click in the circle located to the right of the test1Controller outlet and drag the mouse to the test1 View Controller in the Objects panel
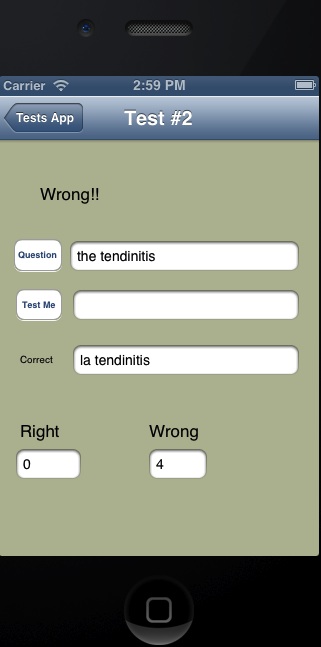
- Now we can code the navigation logic to display the appropriate test when the user clicks on Test #1, Test #2, and Test #3. Open RootViewController.m and
import the test1ViewController.h file and synthesize all property declarations from test1ViewController.h
- Next, open RootViewController.m and process the Test choice that was selected and set the appropriate title of the view controller managing the tests.
- When the test is called, we have to load the correct property list of questions and answers so that we display the correct test. Because
the test is now not controlled by the Main View COntroller and does not launch at start time we have to put the launch logic in viewWillAppear
instead of viewDidLoad. The plist files required that contain the question and answer pairs will be called test1.plist, test2.plist and test3.plist.
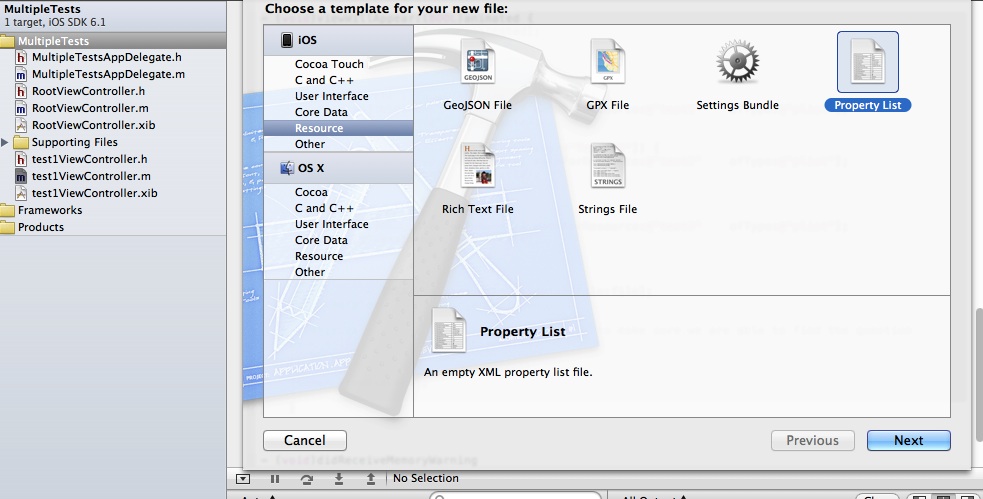
- Create each plist file by selecting the MultipleTests folder, right clicking, selecting New File, selecting iOS resource and selecting
property list. Name the files test1, test2, and test3.
- Close xcode and at the OS level modify the questions.plist file from the initial test and modify the questions and answers so that you
have a unique file for test1.plist, test2.plist, and test3.plist. Copy them to replace the three plist files that you created in the previous step.
You should now have a working application that allows you to access multiple tests from a Table View. To add additional tests, you would
just have to add the new plist file for that test, add the new test entry in the didSelectRowAtIndexPath method in the RootViewController.m file,
populate the testList array in the viewDidLoad method in RootViewController.m, and add the plist file to be loaded when your new choice is selected
from the Table View.
By: Rene Kondratzky